• Recent
    • Unsolved
    • Tags
    • Popular
    • Users
    • Groups
    • Search
    • Register
    • Login
    1. Home
    2. baovipboy156
    B
    • Profile
    • Following 0
    • Followers 0
    • Topics 2
    • Posts 12
    • Best 3
    • Controversial 0
    • Groups 0

    baovipboy156

    @baovipboy156

    4
    Reputation
    5
    Profile views
    12
    Posts
    0
    Followers
    0
    Following
    Joined Last Online

    baovipboy156 Unfollow Follow

    Best posts made by baovipboy156

    • RE: add Ventoy to boot menu

      fog > ipxe menu > add option:

      set net0/next-server 192.168.1.254
      chain --replace --autofree ipxe.x64.snponly.efi.0
      

      on ubuntu fog server: edit file /etc/dhcp/dhcpd.conf

      class "UEFI-64-1" {
          match if substring(option vendor-class-identifier, 0, 20) = "PXEClient:Arch:00007";
          if exists user-class and option user-class = "iVentoy"{
          filename "iventoy_loader_16000_uefi";
          next-server 192.168.152.254;
      } else {
          filename "ipxe.efi";
      }
      }
      

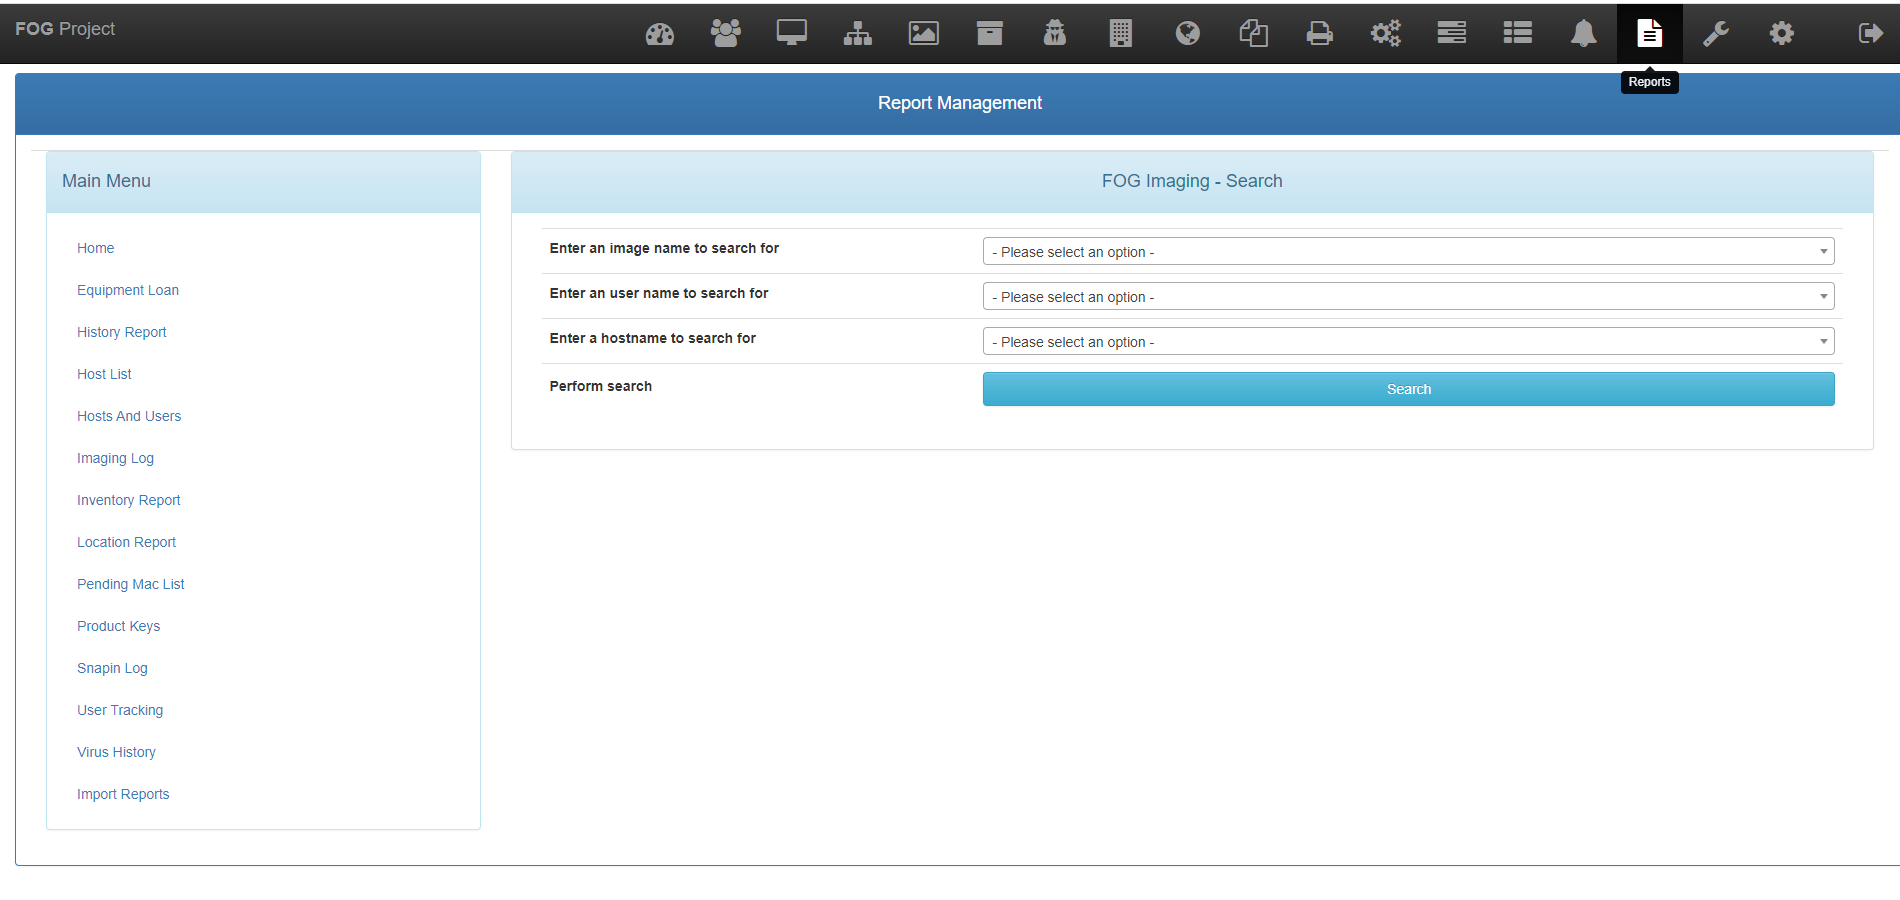
      i manged to chain ventoy but the graphic is bugged
      posted in Feature Request
      B
      baovipboy156
    • RE: Task Log file?

      598bbe33-9a66-4c93-a559-5ff1063617d9-image.png

      it here dude…

      posted in FOG Problems
      B
      baovipboy156
    • RE: add Ventoy to boot menu

      @youzersef
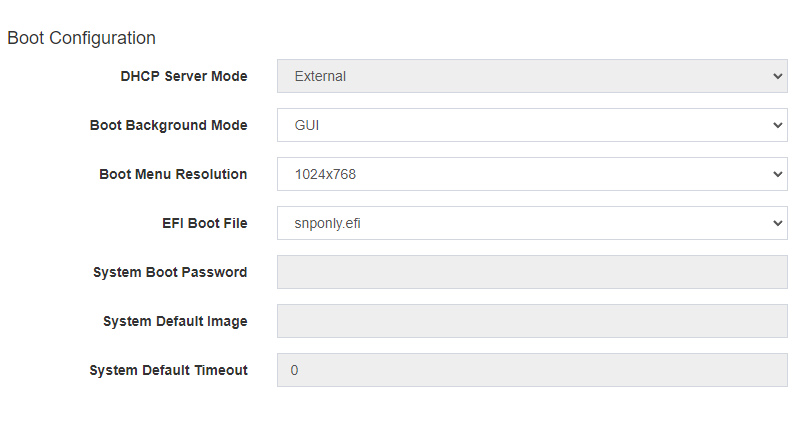
      I found it, root cause: screen resolution 39d260a7-cf2c-4fc3-b0eb-6d59310dae7c-image.png
      some monitor can’t display 1024x768…wtf, then i set it to 1280x720 it work perfectly!

      posted in Feature Request
      B
      baovipboy156

    Latest posts made by baovipboy156

    • RE: add Ventoy to boot menu

      @youzersef
      I found it, root cause: screen resolution 39d260a7-cf2c-4fc3-b0eb-6d59310dae7c-image.png
      some monitor can’t display 1024x768…wtf, then i set it to 1280x720 it work perfectly!

      posted in Feature Request
      B
      baovipboy156
    • RE: add Ventoy to boot menu

      @youzersef
      Did you got the booting ISO working normally?, seem the graphic is bugged with some modern mainboard

      posted in Feature Request
      B
      baovipboy156
    • RE: add Ventoy to boot menu

      fog > ipxe menu > add option:

      set net0/next-server 192.168.1.254
      chain --replace --autofree ipxe.x64.snponly.efi.0
      

      on ubuntu fog server: edit file /etc/dhcp/dhcpd.conf

      class "UEFI-64-1" {
          match if substring(option vendor-class-identifier, 0, 20) = "PXEClient:Arch:00007";
          if exists user-class and option user-class = "iVentoy"{
          filename "iventoy_loader_16000_uefi";
          next-server 192.168.152.254;
      } else {
          filename "ipxe.efi";
      }
      }
      

      i manged to chain ventoy but the graphic is bugged
      posted in Feature Request
      B
      baovipboy156
    • RE: Two VLANs (Two IP ranges)

      as your case, i have 3 solution:

      1. create a rule on pfsense any IPv4 can see the fog server 192.168.10.ipfogserver
      2. on the wan site aka upstream network, forward port to the fogserver, so all the internal can see the fog server
      3. modify the fog client to use dns or inject custom code like

      (if current ip ==192.168.10.x)
      set ip fogserver 192.168.10.fogserver
      else set ip fogserver 192.168.0.fogserver

      posted in FOG Problems
      B
      baovipboy156
    • RE: Task Log file?

      598bbe33-9a66-4c93-a559-5ff1063617d9-image.png

      it here dude…

      posted in FOG Problems
      B
      baovipboy156
    • RE: ability to load a menu item on a specific machine as an immediate task

      05a710e7-8a9f-47bf-95e3-5ebc00e8477c-image.png
      the keyword is custom tasktype, we have a plugin can “force” the ipxe to auto boot custom item

      posted in FOG Problems
      B
      baovipboy156
    • RE: bootable USB FOG image

      You can try using my method for deploy image (not using fog but dism and windows original ISO file)

      1. make sure you sysprep your image with the right unattend.xml file.
      2. boot into some sort of minitool/hirenboot/winpe.
      3. capture your image with dism ex: Dism /Capture-Image /ImageFile:“U:\Your USB\your_custome_windows.wim” /CaptureDir:C:\ /Name:Your_image_name
      4. take the your_custome_windows.wim to your main PC and rename it to install.wim
      5. use anyburn or ultraiso to edit the original windows 10 pro downloaded from microsoft, replace the /source/install.wim in the iso with your “install.wim”
      6. then save the iso as “your_custom_image.iso”
      7. try install window with your created iso.

      hope this help you.

      posted in FOG Problems
      B
      baovipboy156
    • RE: Golden image problem

      @george1421
      My golden image include these software:
      chrome, firefox, egde, acrobat reader, skype, thunder bird, trellix endpoint security, osquery.

      I don’t know if i doing something wrong.

      Thank for your unattend file, i will try sysprep again with your, hope it work 🙂

      posted in Windows Problems
      B
      baovipboy156
    • Golden image problem

      Dear all,

      I using fog 1.5.10 on Ubuntu 22.04, I created a golden image followed these step:

      1. install a fresh window 10 using MDT/WDS
      2. update window, update all application,…etc
      3. sysprep using unattend file
      4. capture image using fog

      summary the problem:

      1. The first boot up after deployment, it take over 30mins to get to welcome screen.
      2. after joined domain, the bootup and shutdown process take time sightly slower a PC deployed with MDT/WDS
        • MDT/WDS ~30 second for it boot up to welcome screen
        • fog deployed PC take ~1 for boot up to welcome screen
      3. The disk usage 100 (check by open task manager):
        • MDT/WDS take ~2 mins from 100% disk to 0%
        • fog take ~5 mins from 100% disk to 0%
          I ran all the method of disk defrag, optimize, disk clean up, check file system, dism… , disable unnessary startup service, ran window update, updated all hardware driver
          here is my unattend.xml
      <?xml version="1.0" encoding="utf-8"?>
      <unattend xmlns="urn:schemas-microsoft-com:unattend">
          <settings pass="windowsPE">
              <component name="Microsoft-Windows-International-Core-WinPE" processorArchitecture="amd64" publicKeyToken="31bf3856ad364e35" language="neutral" versionScope="nonSxS" xmlns:wcm="http://schemas.microsoft.com/WMIConfig/2002/State" xmlns:xsi="http://www.w3.org/2001/XMLSchema-instance">
                  <SetupUILanguage>
                      <UILanguage>en-US</UILanguage>
                  </SetupUILanguage>
                  <InputLocale>0409:00000409</InputLocale>
                  <SystemLocale>en-US</SystemLocale>
                  <UILanguage>en-US</UILanguage>
                  <UILanguageFallback>en-US</UILanguageFallback>
                  <UserLocale>en-US</UserLocale>
              </component>
              <component name="Microsoft-Windows-Setup" processorArchitecture="amd64" publicKeyToken="31bf3856ad364e35" language="neutral" versionScope="nonSxS" xmlns:wcm="http://schemas.microsoft.com/WMIConfig/2002/State" xmlns:xsi="http://www.w3.org/2001/XMLSchema-instance">
                  <UserData>
                      <AcceptEula>true</AcceptEula>
                      <FullName>Administrator</FullName>
                      <Organization>TEST</Organization>
                      <ProductKey>
                          <Key />
                          <WillShowUI>Never</WillShowUI>
                      </ProductKey>
                  </UserData>
              </component>
          </settings>
          <settings pass="offlineServicing">
              <component name="Microsoft-Windows-LUA-Settings" processorArchitecture="amd64" publicKeyToken="31bf3856ad364e35" language="neutral" versionScope="nonSxS" xmlns:wcm="http://schemas.microsoft.com/WMIConfig/2002/State" xmlns:xsi="http://www.w3.org/2001/XMLSchema-instance">
                  <EnableLUA>true</EnableLUA>
              </component>
          </settings>
          <settings pass="generalize">
              <component name="Microsoft-Windows-Security-SPP" processorArchitecture="amd64" publicKeyToken="31bf3856ad364e35" language="neutral" versionScope="nonSxS" xmlns:wcm="http://schemas.microsoft.com/WMIConfig/2002/State" xmlns:xsi="http://www.w3.org/2001/XMLSchema-instance">
                  <SkipRearm>1</SkipRearm>
              </component>
          </settings>
          <settings pass="specialize">
              <component name="Microsoft-Windows-International-Core" processorArchitecture="amd64" publicKeyToken="31bf3856ad364e35" language="neutral" versionScope="nonSxS" xmlns:wcm="http://schemas.microsoft.com/WMIConfig/2002/State" xmlns:xsi="http://www.w3.org/2001/XMLSchema-instance">
                  <InputLocale>0409:00000409</InputLocale>
                  <SystemLocale>en-US</SystemLocale>
                  <UILanguage>en-US</UILanguage>
                  <UILanguageFallback>en-US</UILanguageFallback>
                  <UserLocale>en-US</UserLocale>
              </component>
              <component name="Microsoft-Windows-Shell-Setup" processorArchitecture="amd64" publicKeyToken="31bf3856ad364e35" language="neutral" versionScope="nonSxS" xmlns:wcm="http://schemas.microsoft.com/WMIConfig/2002/State" xmlns:xsi="http://www.w3.org/2001/XMLSchema-instance">
                  <ComputerName></ComputerName>
                  <RegisteredOrganization>TEST</RegisteredOrganization>
                  <RegisteredOwner>Windows 10 TEST</RegisteredOwner>
                  <DoNotCleanTaskBar>True</DoNotCleanTaskBar>
              </component>
          </settings>
          <settings pass="oobeSystem">
              <component name="Microsoft-Windows-Shell-Setup" processorArchitecture="amd64" publicKeyToken="31bf3856ad364e35" language="neutral" versionScope="nonSxS" xmlns:wcm="http://schemas.microsoft.com/WMIConfig/2002/State" xmlns:xsi="http://www.w3.org/2001/XMLSchema-instance">
                  <AutoLogon>
                      <Password>
                          <Value>123456789</Value>
                          <PlainText>true</PlainText>
                      </Password>
                      <Enabled>true</Enabled>
                      <Username>Administrator</Username>
                      <LogonCount>3</LogonCount>
                  </AutoLogon>
                  <OOBE>
                      <HideEULAPage>true</HideEULAPage>
                      <HideOEMRegistrationScreen>true</HideOEMRegistrationScreen>
                      <HideOnlineAccountScreens>true</HideOnlineAccountScreens>
                      <HideWirelessSetupInOOBE>true</HideWirelessSetupInOOBE>
                      <NetworkLocation>Work</NetworkLocation>
                      <SkipUserOOBE>true</SkipUserOOBE>
                      <SkipMachineOOBE>true</SkipMachineOOBE>
                      <ProtectYourPC>3</ProtectYourPC>
                  </OOBE>
                  <UserAccounts>
                      <LocalAccounts>
                          <LocalAccount wcm:action="add">
                              <Password>
                                  <Value>123456789</Value>
                                  <PlainText>true</PlainText>
                              </Password>
                              <Description />
                              <DisplayName>Administrator</DisplayName>
                              <Group>Administrators</Group>
                              <Name>Administrator</Name>
                          </LocalAccount>
                      </LocalAccounts>
                  </UserAccounts>
                  <RegisteredOrganization>TEST</RegisteredOrganization>
                  <RegisteredOwner>Windows 10 TEST</RegisteredOwner>
                  <DisableAutoDaylightTimeSet>false</DisableAutoDaylightTimeSet>
                  <FirstLogonCommands>
                      <SynchronousCommand wcm:action="add">
                          <Description>Control Panel View</Description>
                          <Order>1</Order>
                          <CommandLine>reg add "HKEY_CURRENT_USER\Software\Microsoft\Windows\CurrentVersion\Explorer\ControlPanel" /v StartupPage /t REG_DWORD /d 1 /f</CommandLine>
                          <RequiresUserInput>true</RequiresUserInput>
                      </SynchronousCommand>
                      <SynchronousCommand wcm:action="add">
                          <Order>2</Order>
                          <Description>Control Panel Icon Size</Description>
                          <RequiresUserInput>false</RequiresUserInput>
                          <CommandLine>reg add "HKEY_CURRENT_USER\Software\Microsoft\Windows\CurrentVersion\Explorer\ControlPanel" /v AllItemsIconView /t REG_DWORD /d 1 /f</CommandLine>
                      </SynchronousCommand>
                      <SynchronousCommand wcm:action="add">
                          <Order>3</Order>
                          <RequiresUserInput>false</RequiresUserInput>
                          <CommandLine>cmd /C wmic useraccount where name="Administrator" set PasswordExpires=false</CommandLine>
                          <Description>Password Never Expires</Description>
                      </SynchronousCommand>
                      <SynchronousCommand wcm:action="add">
                          <Order>4</Order>
                          <RequiresUserInput>false</RequiresUserInput>
                          <CommandLine>cmd /C del C:\Windows\System32\Sysprep\auto.xml</CommandLine>
                      </SynchronousCommand>
                  </FirstLogonCommands>
                  <TimeZone>SE Asia Standard Time</TimeZone>
              </component>
          </settings>
          <cpi:offlineImage cpi:source="" xmlns:cpi="urn:schemas-microsoft-com:cpi" />
      </unattend>
      

      Hope my unattend file may help someone need it and hope someone can help me 🙂

      Thanks and regard,
      Bao.

      posted in Windows Problems
      B
      baovipboy156
    • RE: WDS and Fog with Syslinux - Need Help!

      Currently, I using FOG to chain to WDS but facing an issue: some how the network card only use 100mbps of 1Gbps,

      BTW @boros how do you make your golden image ?
      mine:

      1. install fresh OS from WDS on a VM
      2. update window, update application
      3. sysprep using unattend file
      4. capture with fog
        when i deploy this image to other PC, the boot up speed and shutdown is slightly slower a PC deployed with WDS. Did i missing some thing…
      posted in FOG Problems
      B
      baovipboy156