
BSOD with Windows 11 24H2 - Automatic Repair - SrtTrail after FOG deployment and restart
SOLVED
This are the steps for the BSOD error FIX. The problem was that after you deployed the FOG image and a few restarts the system enters in BSOD and then remains stuck with nothing else to do.
-
Enter in WSIM (Windows System Image Manager) when you finished all your steps before the sysprep command -
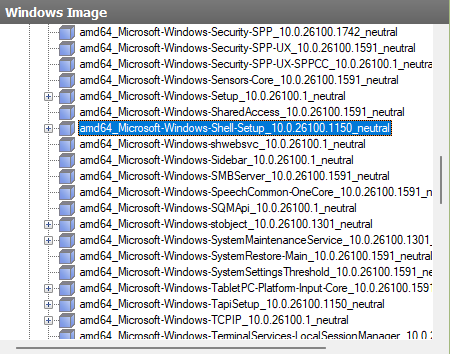
Select your windows image on the left corner window -
Select the distribution share on the left-up side window -
Select your Answer File from the center window -
Now, all you have to do is to add/change some lines in your answer file
Step 1:
-
Windows Image – extend: Components – find: amd64_Microsoft-Windows-Shell-Setup_neutral
-
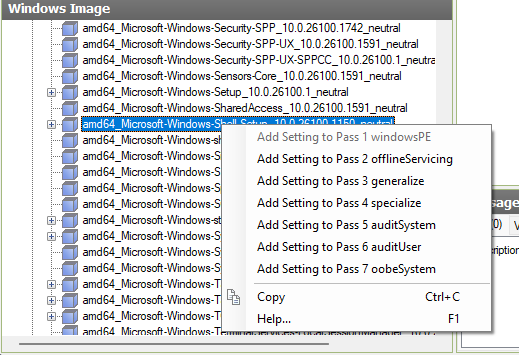
Right click Add Setting to Pass 7 oobeSystem:
Now, for the Answer file side:
-
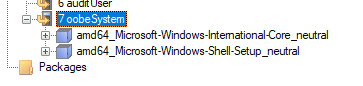
Extend oobeSystem
-
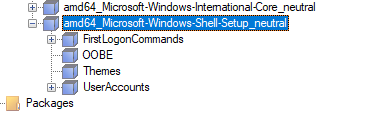
Extend amd64_Microsoft-Windows-Shell-Setup_neutral
-
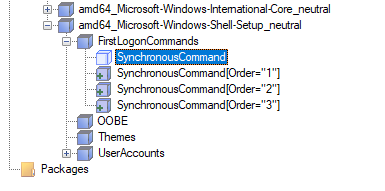
Right click on FirstLogonCommands and Insert New SynchronousCommand
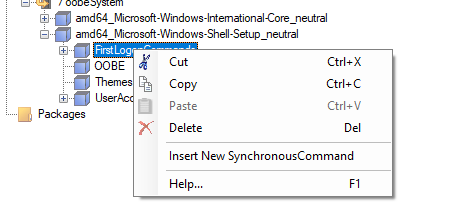
-
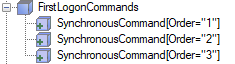
You have to insert 3 times (Insert New SynchronousCommand) and you will end up with 3 empty cubes (I have one in the picture because I already finished them, and in the final step they will look fill with a little green plus on left)
-
Left click on SynchronousCommand (The first) and add the lines like below. -
Left click on SynchronousCommand (The second) and add the lines like below. -
Left click on SynchronousCommand (The third) and add the lines like below.
First Line:
Command line: bcdedit -set {current} osdevice partition=C:
Description: BCD Fix 1
Order: 1

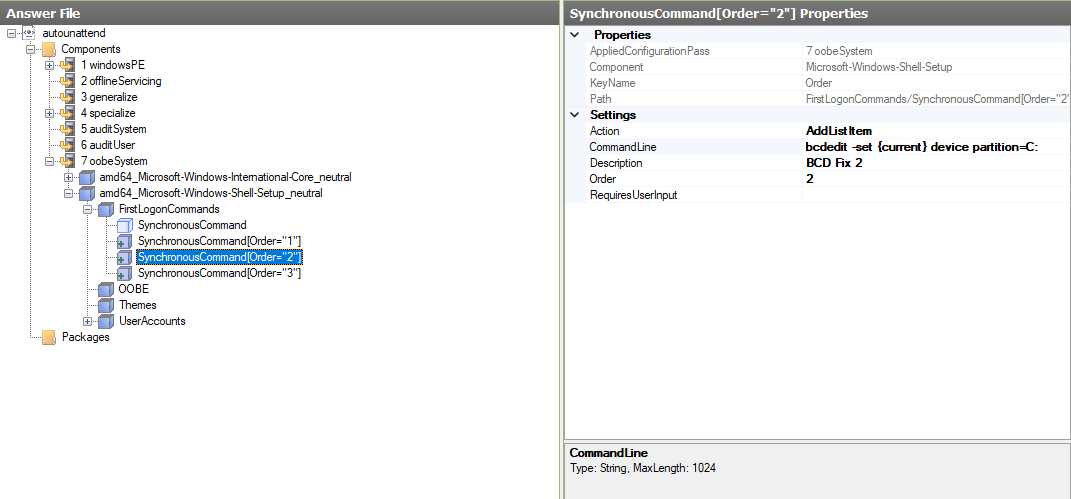
Second Line:
Command line: bcdedit -set {current} device partition=C:
Description: BCD Fix 2
Order: 2
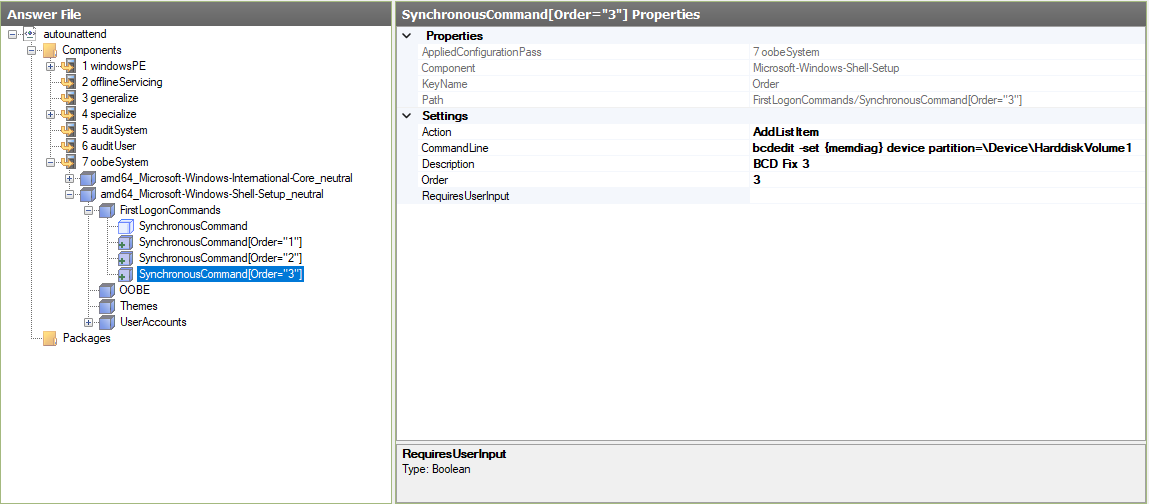
Third Line:
Command line: bcdedit -set {memdiag} device partition=\Device\HarddiskVolume1
Description: BCD Fix 3
Order: 3
At the final step, they will look like this:
Now, Validate your Answer File, save it and you are done, problem solved! ")
P.S: This is the site that helped me and I made a tutorial step by step with screenshots how to solve it.
https://www.elevenforum.com/t/windows-11-deployment-issues-after-sysprep.32682/